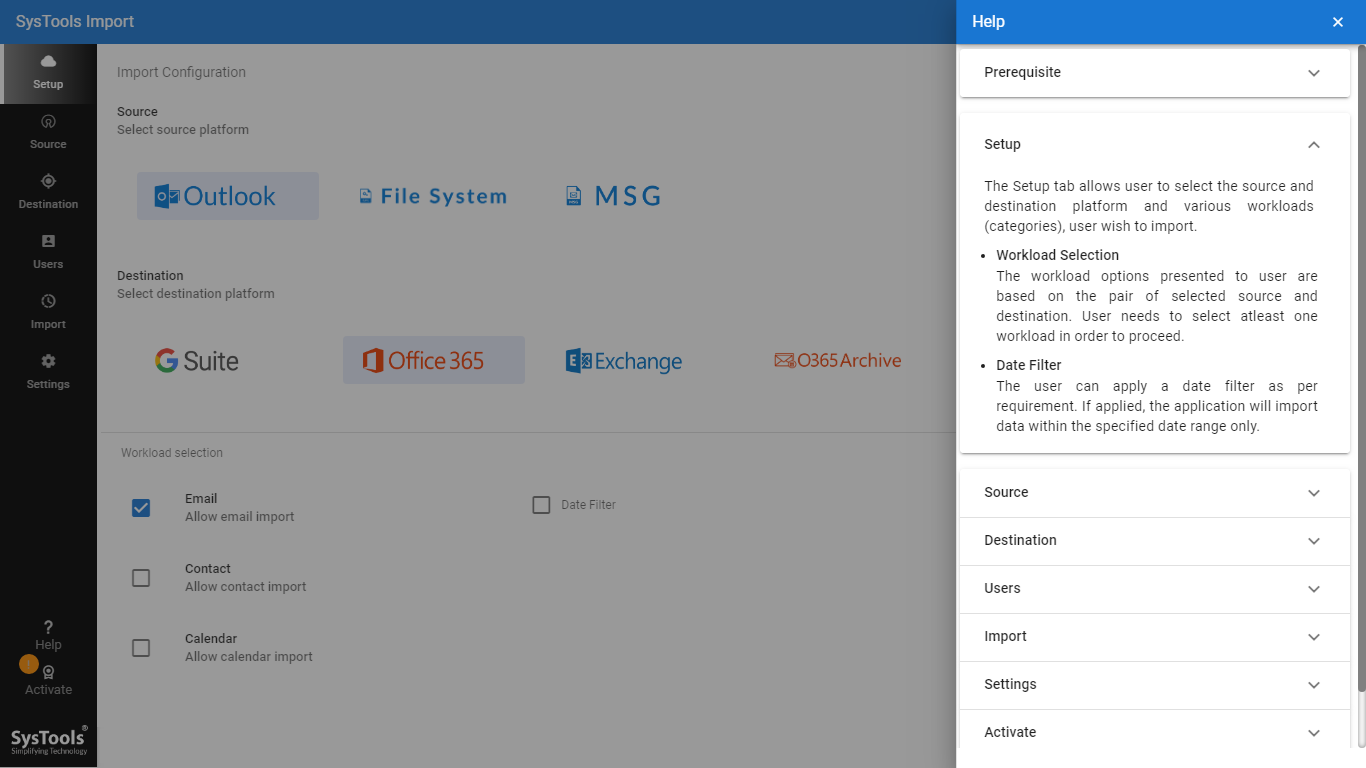
How to Import PST to Office 365 Mailbox – Step by Step Guide

Import PST file to Office 365 With User Admin Account

STEP 1

Launch the Office 365 Import PST software. The user interface of the software is as follows:

run the solution


STEP 2

Select "Outlook" as the source platform and choose "Office 365" as your destination platform to start the process.

choose source and destination
STEP 3

On the same screen, specify which categories of data you wish to move to Office 365 by selecting them under the "Workload Selection" section.

select categories 3
STEP 4

To import data from a specific time frame, use the Date-Range Filter to select your desired period. Click "Next" to proceed.

4-1
STEP 5

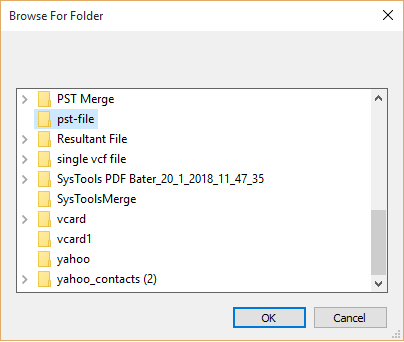
On the following screen, you'll need to locate and specify the folder containing your PST files. Organize your files into user-specific folders (named after the Office 365 email addresses) as follows:

  • Create a folder named “pst” in the root directory of your drive.
  • Inside the “pst” folder, create individual folders for each user, named according to their respective Office 365 email IDs. For instance:
    • E:/PST/[email protected]/(PST files for user1)
    • E:/PST/[email protected]/(PST files for user2)
    • E:/PST/[email protected]/(PST files for user3)
Organized PST Files

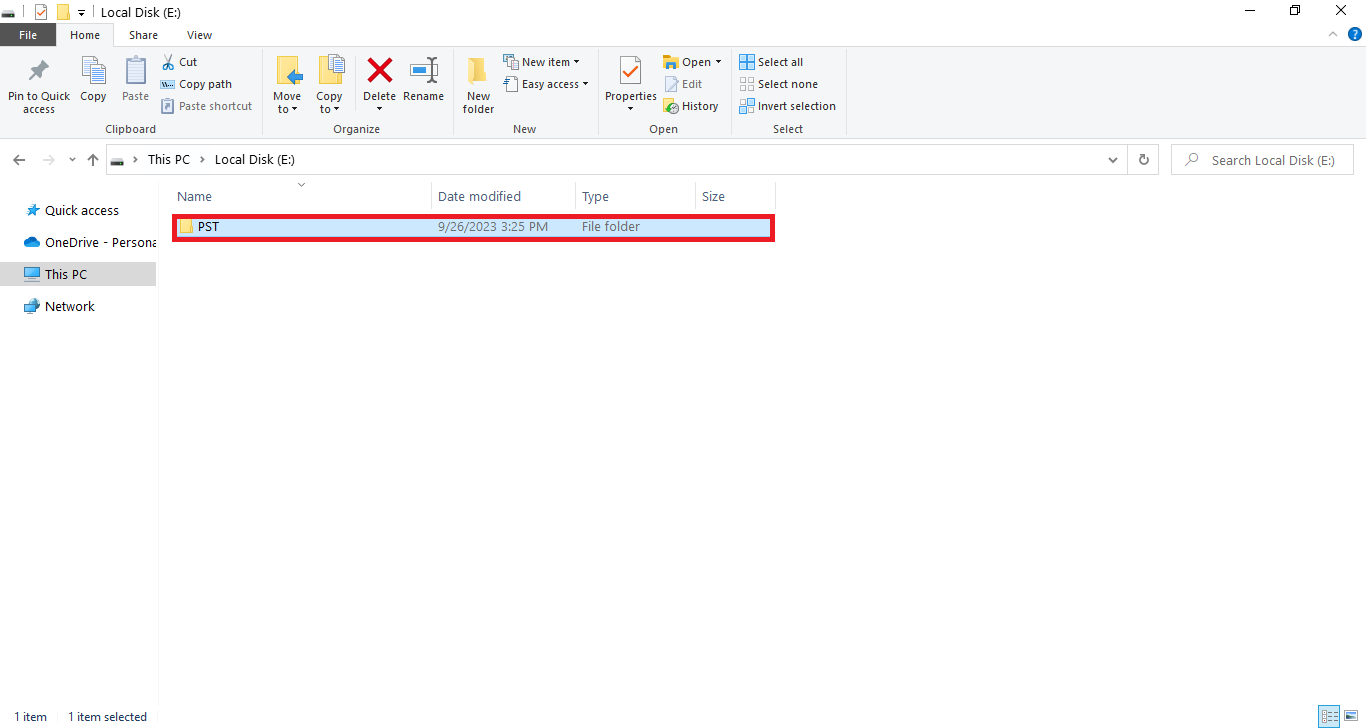
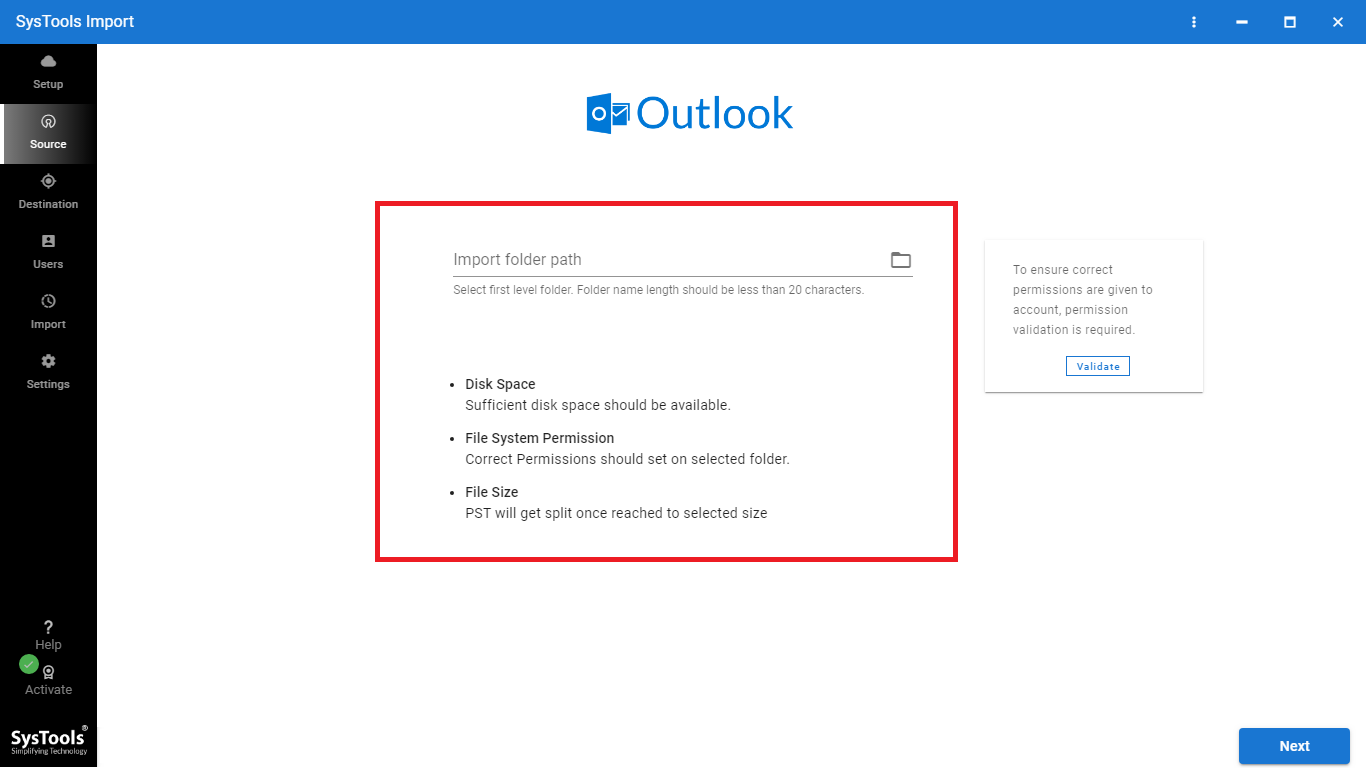
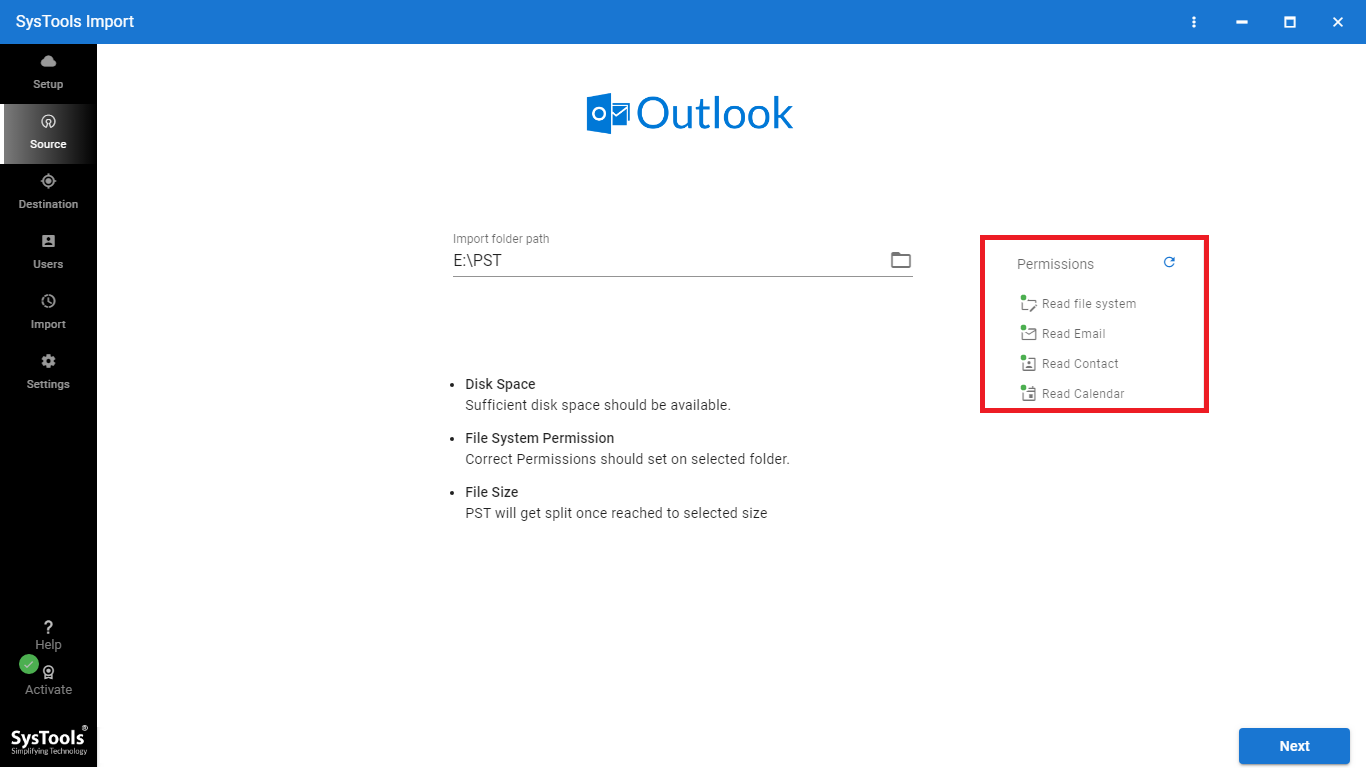
Select "E:/PST/" as your "Import Folder Path" for the next step.

Import Folder Path
STEP 6

Click "Validate" to ensure that the necessary permissions are correctly configured for the files.

hit validate

After validation, the system will assign the necessary permissions to the source platform. Click "Next" to continue.

click Next
STEP 7

Provide the Admin Email & Application ID for your Office 365 account to set up the destination.

provide the credentials
STEP 8

Hit "Validate" to confirm the credentials entered are correct and valid.

Hit Validate

Once the credentials are validated, the system will grant permissions to the admin account. Click "Next" to proceed.

Click Next
STEP 9

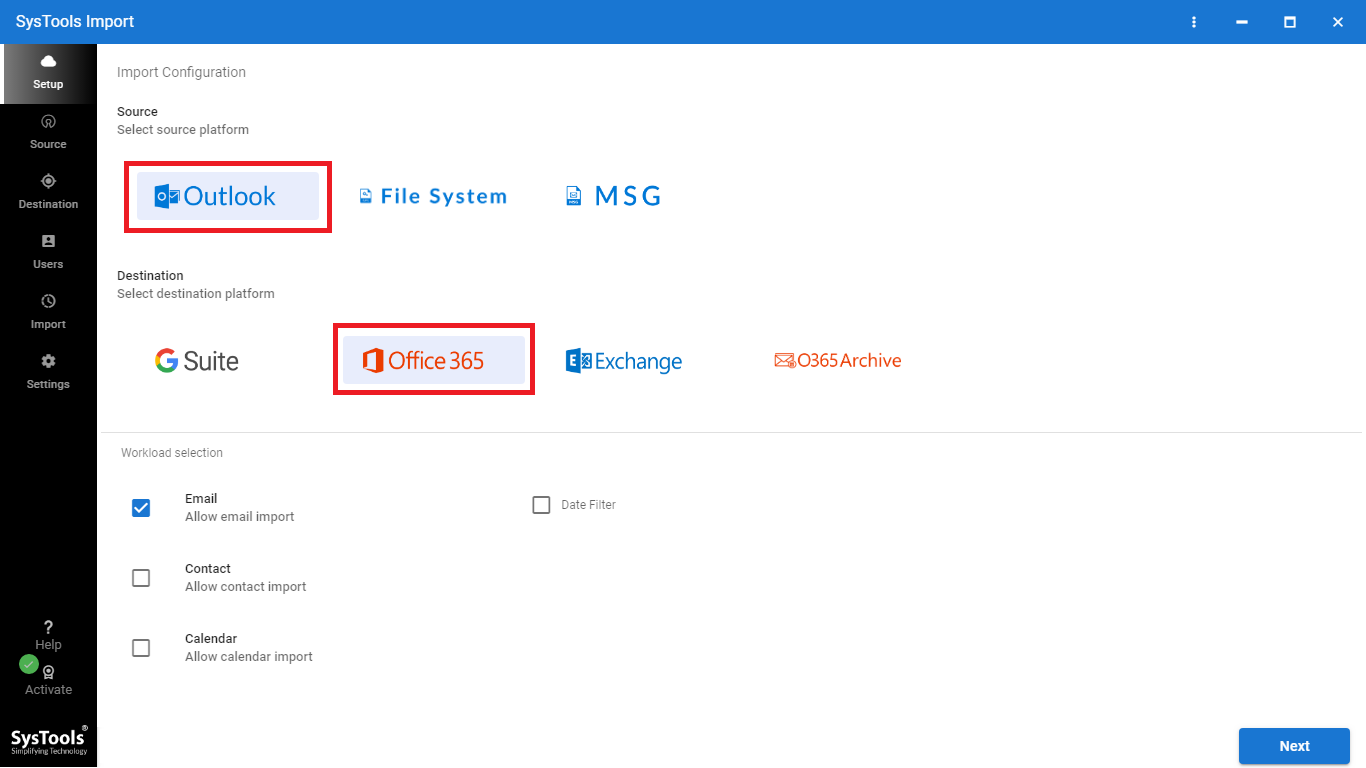
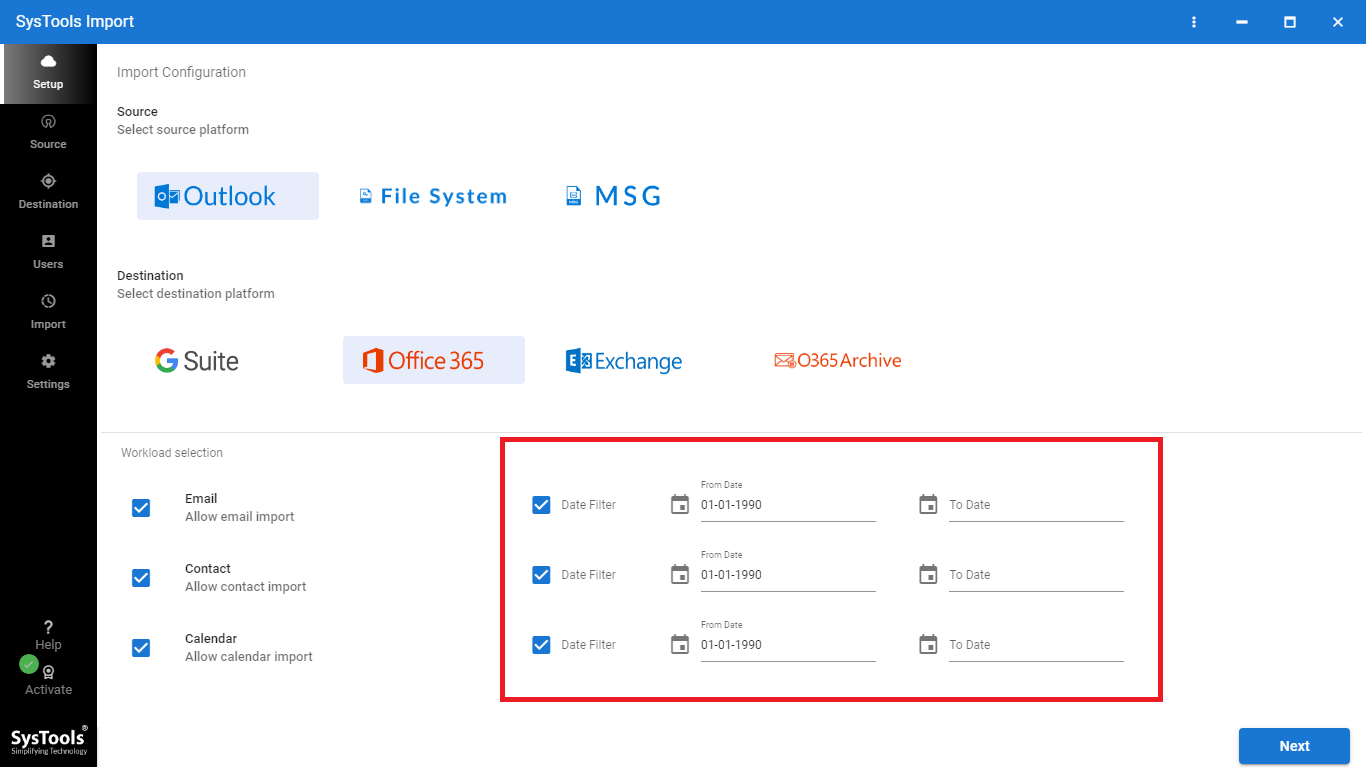
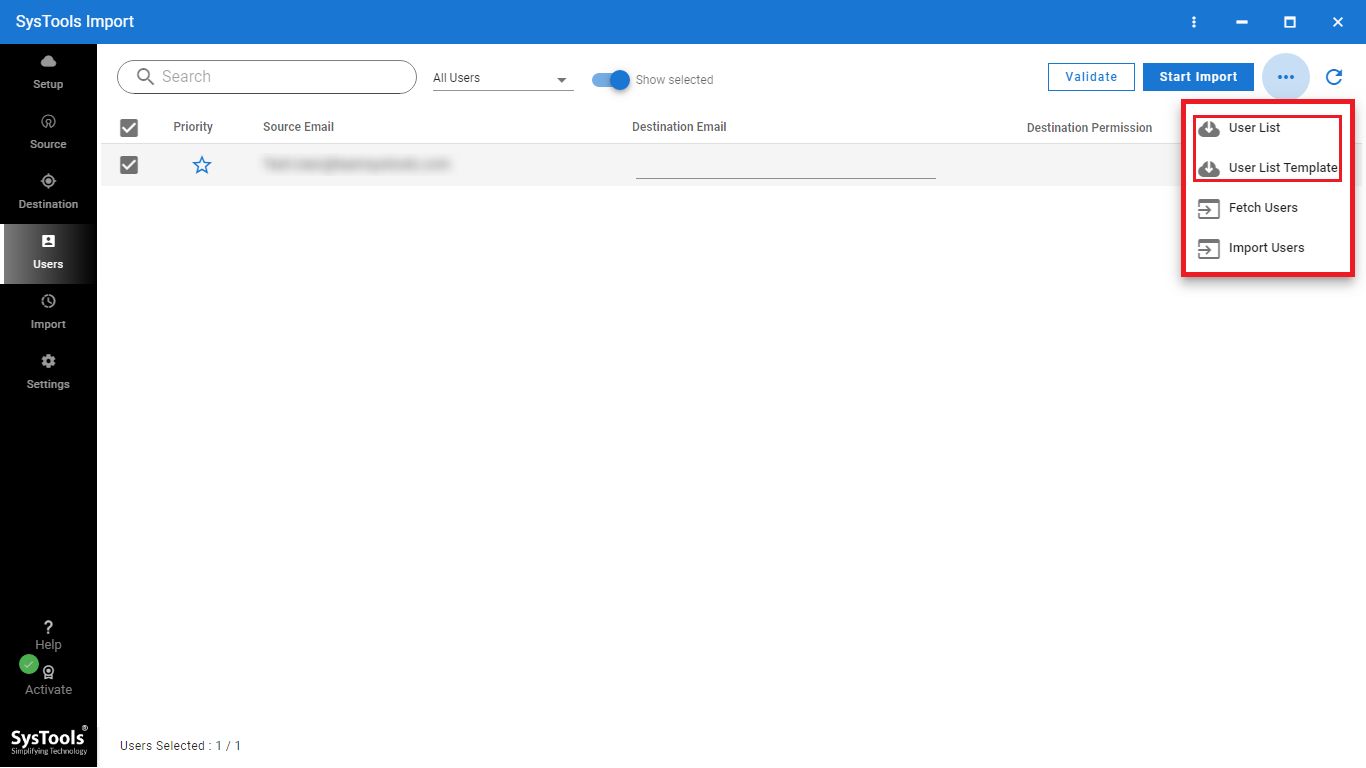
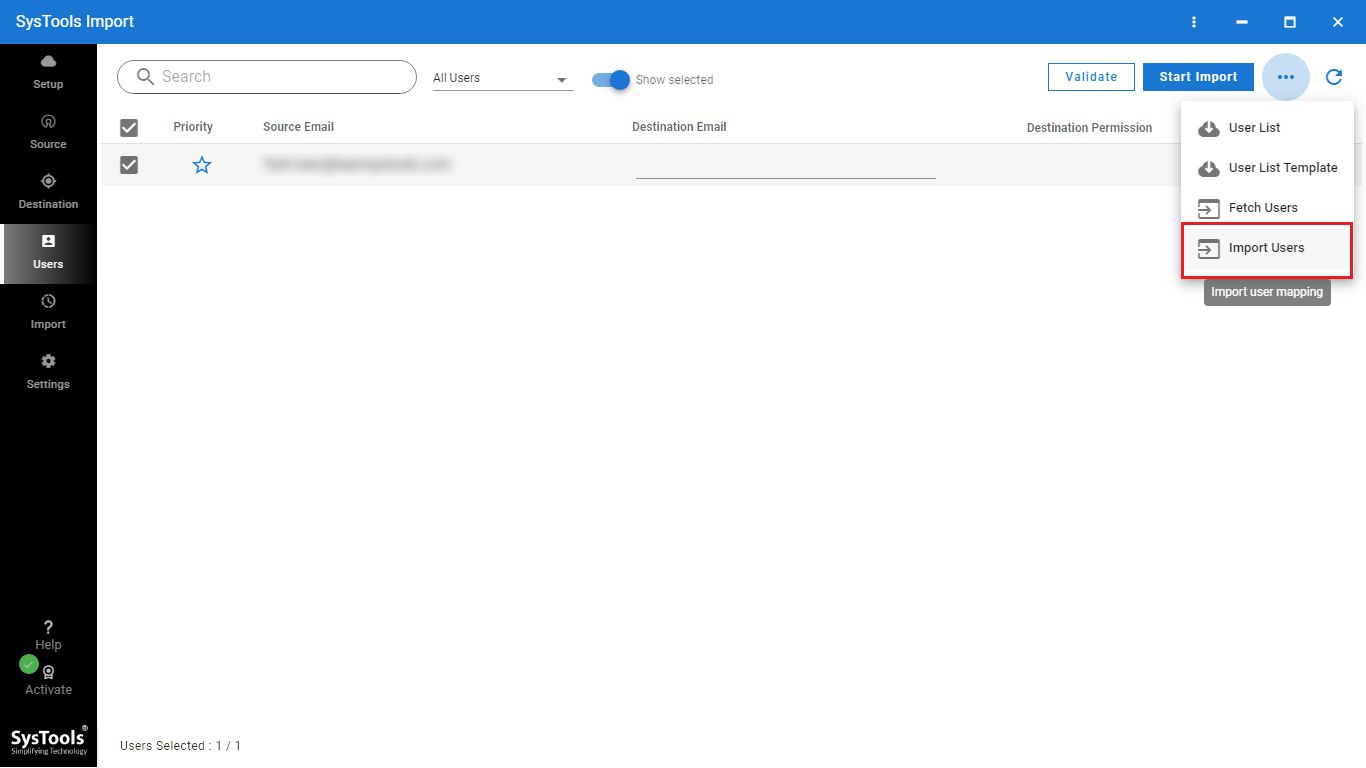
You can now add users whose data you want to migrate. You can choose from the following options:

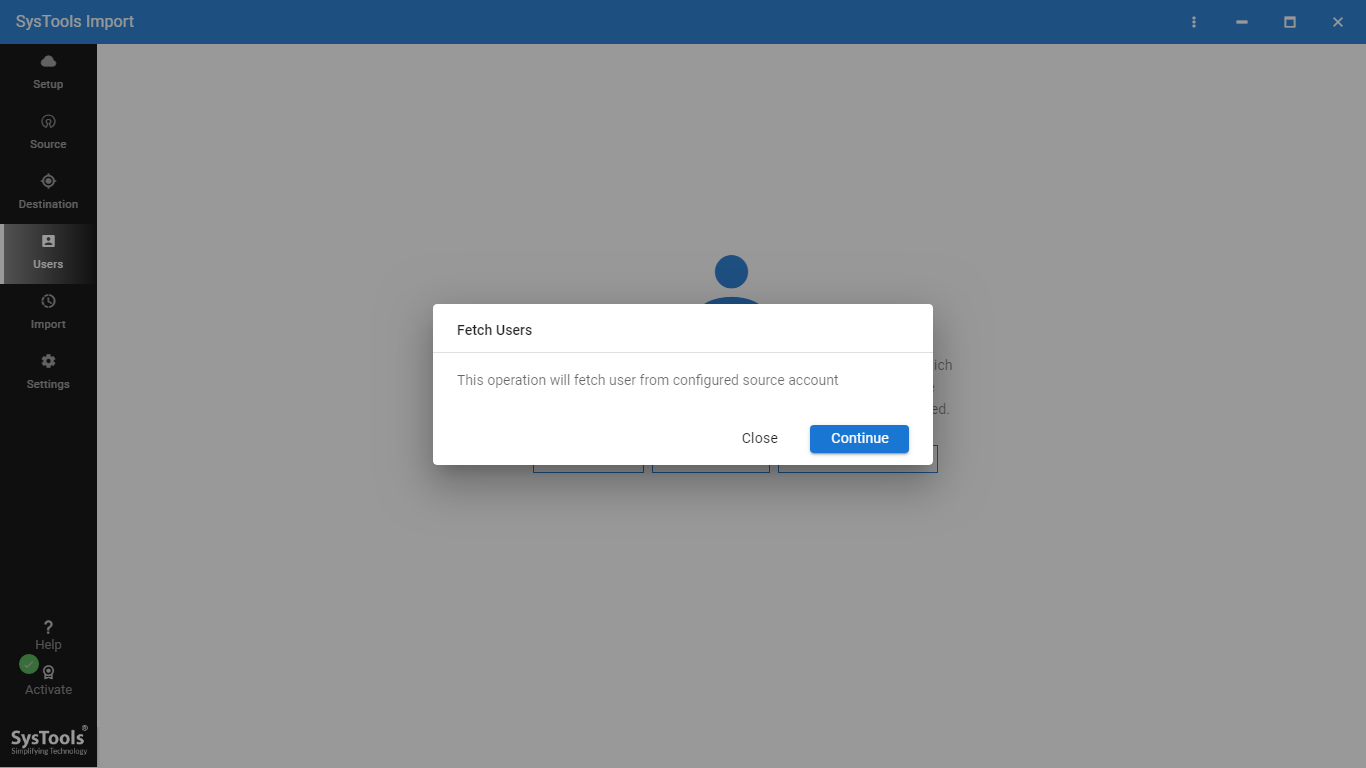
  • Fetch Users: Automatically import users from the source account.
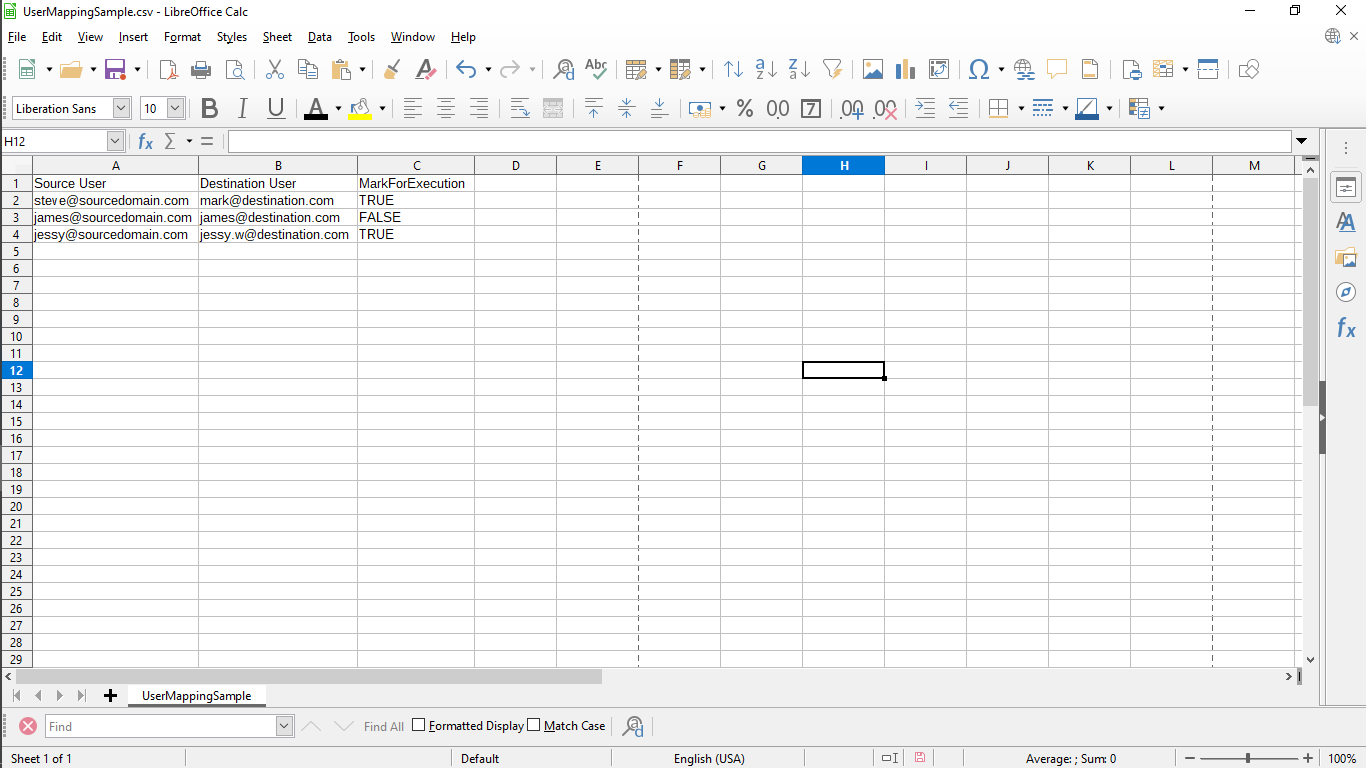
  • Import Users via CSV: Upload a CSV file with user details for import.
  • Download CSV Template: Download a template to manually input user information for the CSV file.
user tab

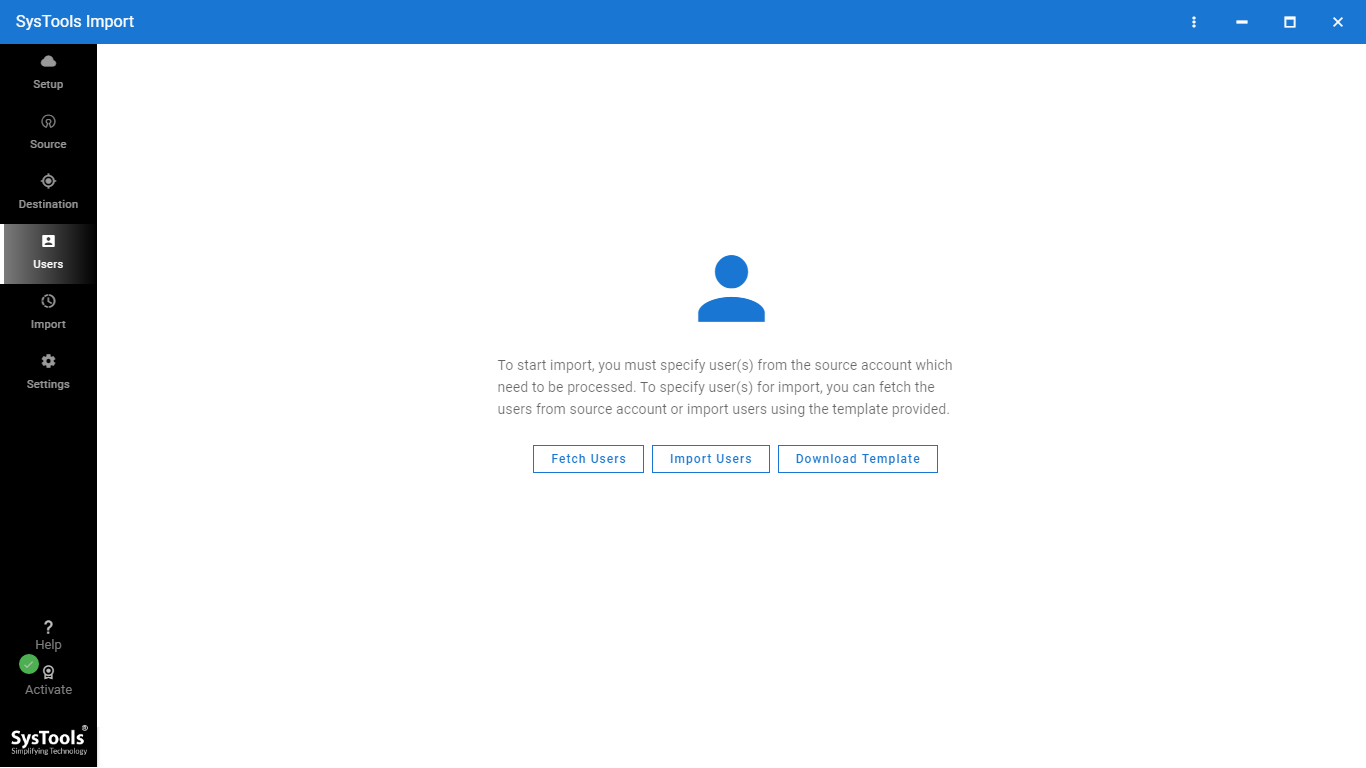
Fetch Users: This option will retrieve all users from the source domain.

Fetch Users

Import Users: This option allows you to upload users via a CSV file..

Import Users

Download Template: This will provide a sample CSV file where you can manually add source users.

Download Template
STEP 10

Once users are added, a list of source users will appear on the screen.

source users

Use the search bar to find a specific user or mailbox and select it for import. You can toggle the "Show Selected" option to view only the selected users for a more focused import.

Show Selected
STEP 11

You will now need to add the destination user accounts. There are two options available:

  • User List Template
  • Import Users

User List Template: Import users manually by filling out a CSV template.

User List Template

Import Users via CSV: Import users using a pre-existing CSV file.

Import Users via CSV
STEP 12

Click "Validate" to check and confirm that both the source and destination accounts are correctly authorized.

Click Validate

After validation, click "OK" to proceed to the next step.

click OK
STEP 13

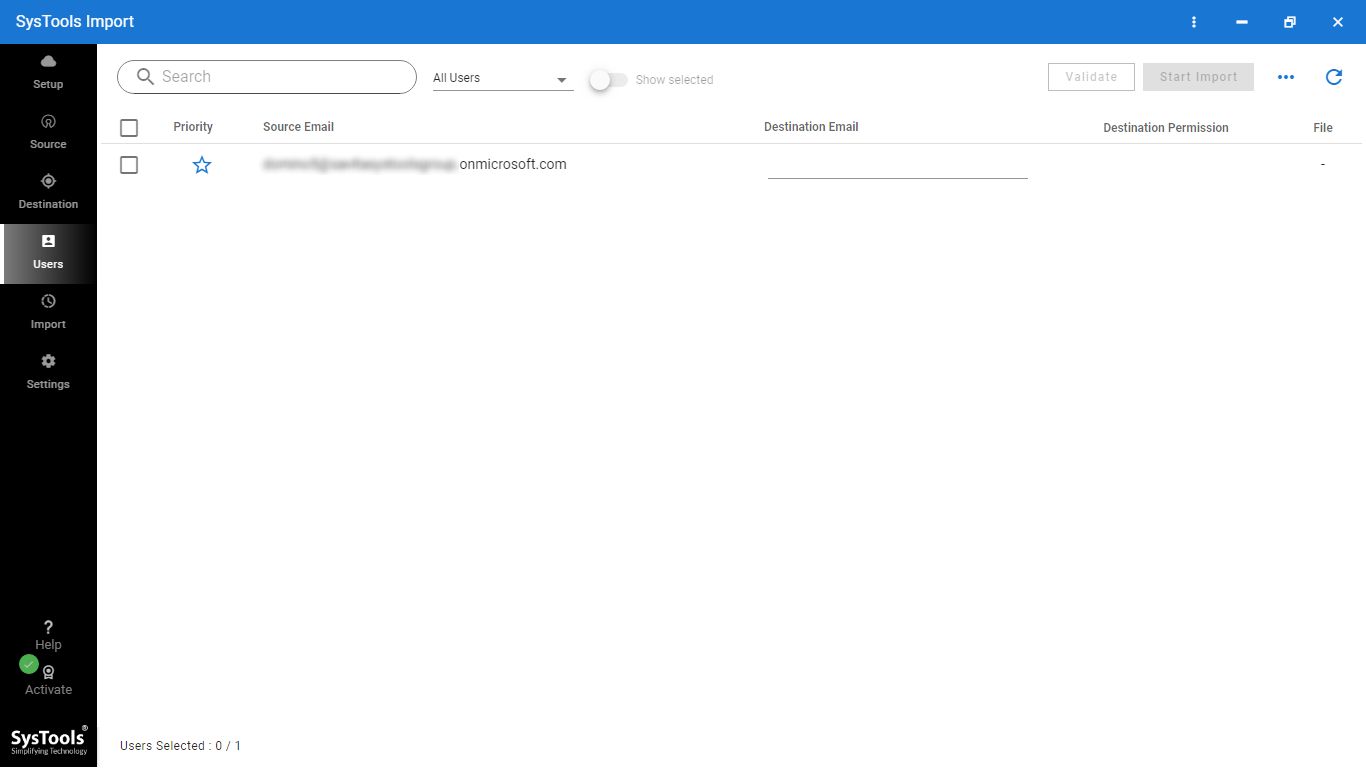
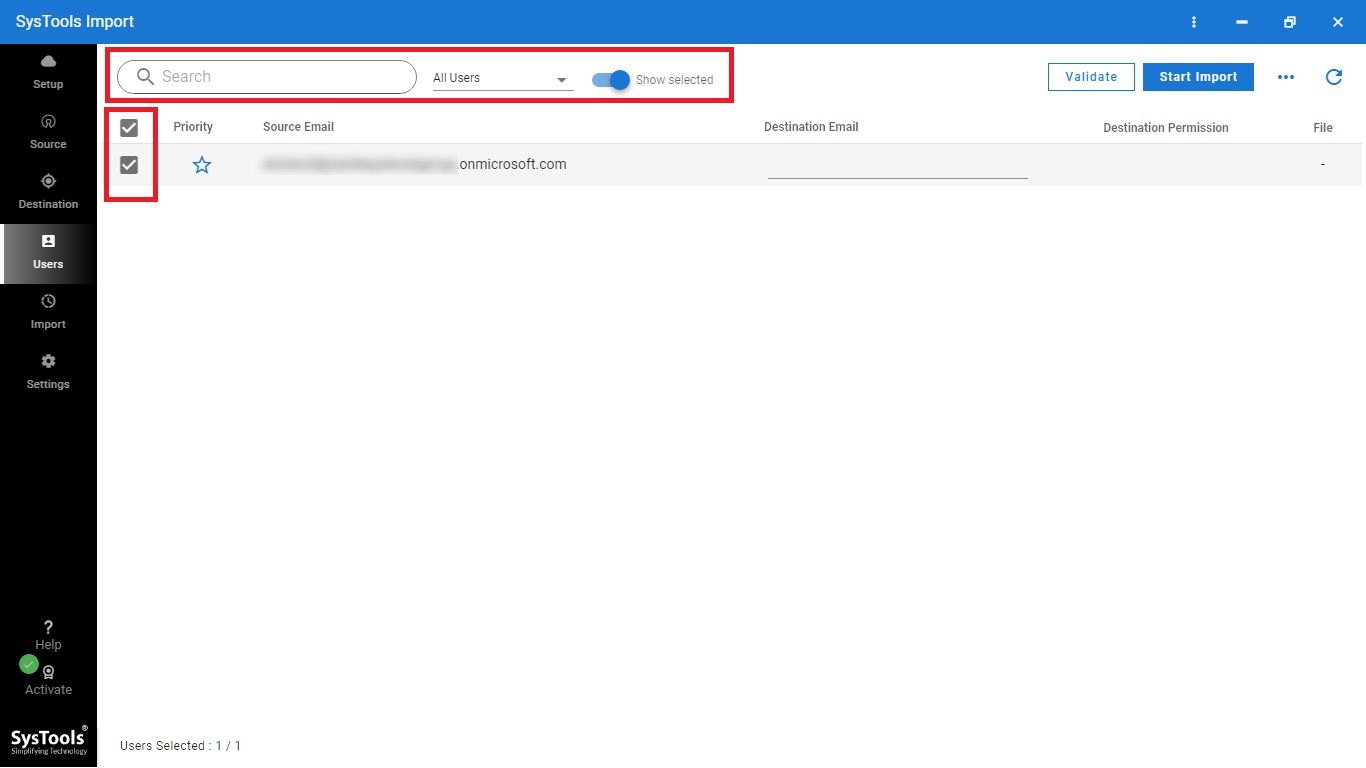
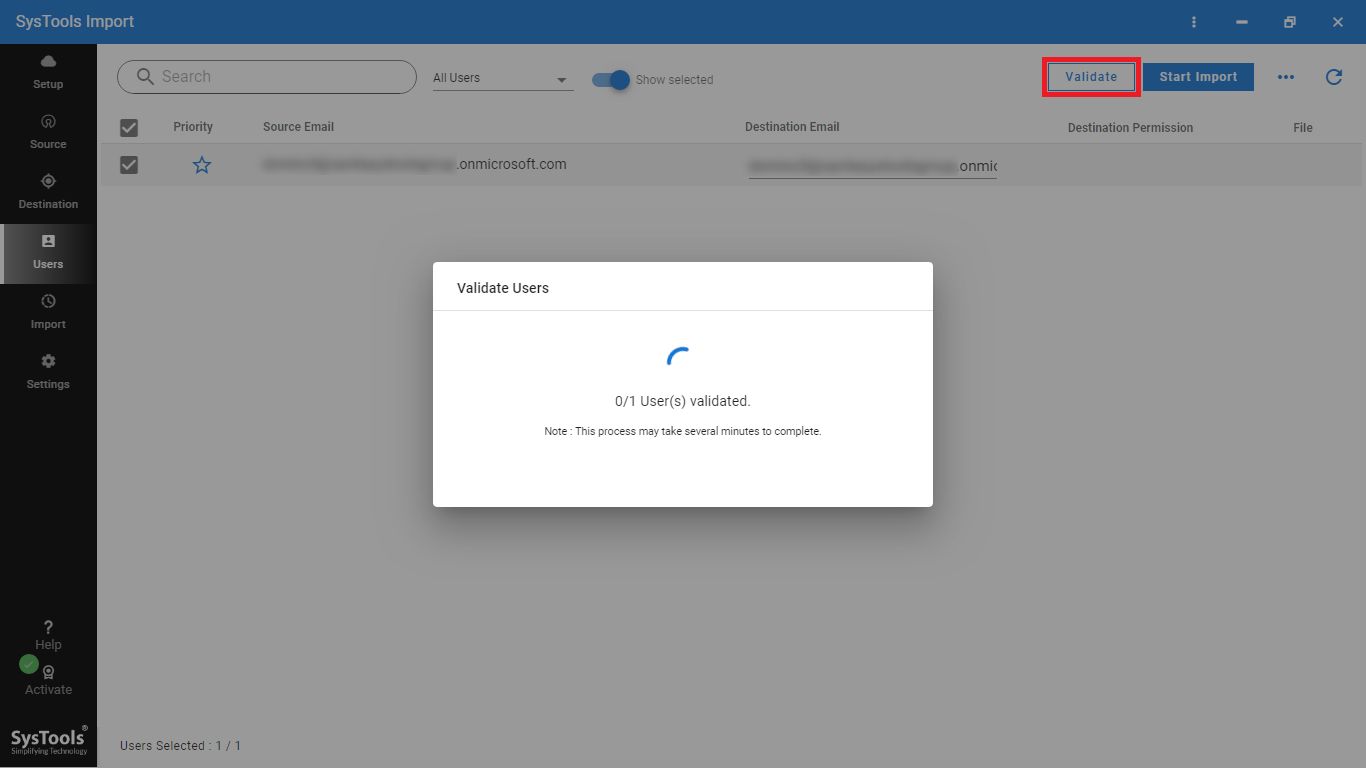
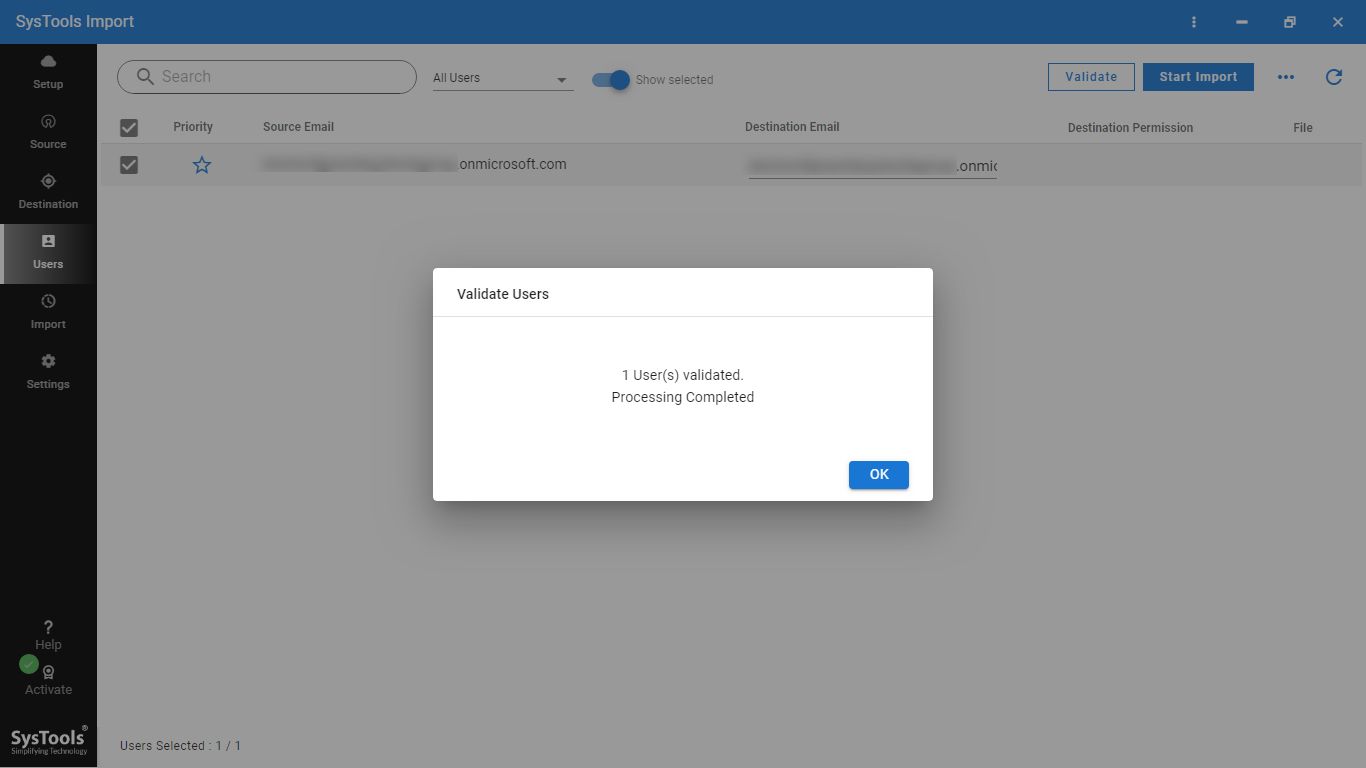
Once you’re ready, click "Start Import" to begin migrating the selected data to Office 365.

click Start Import

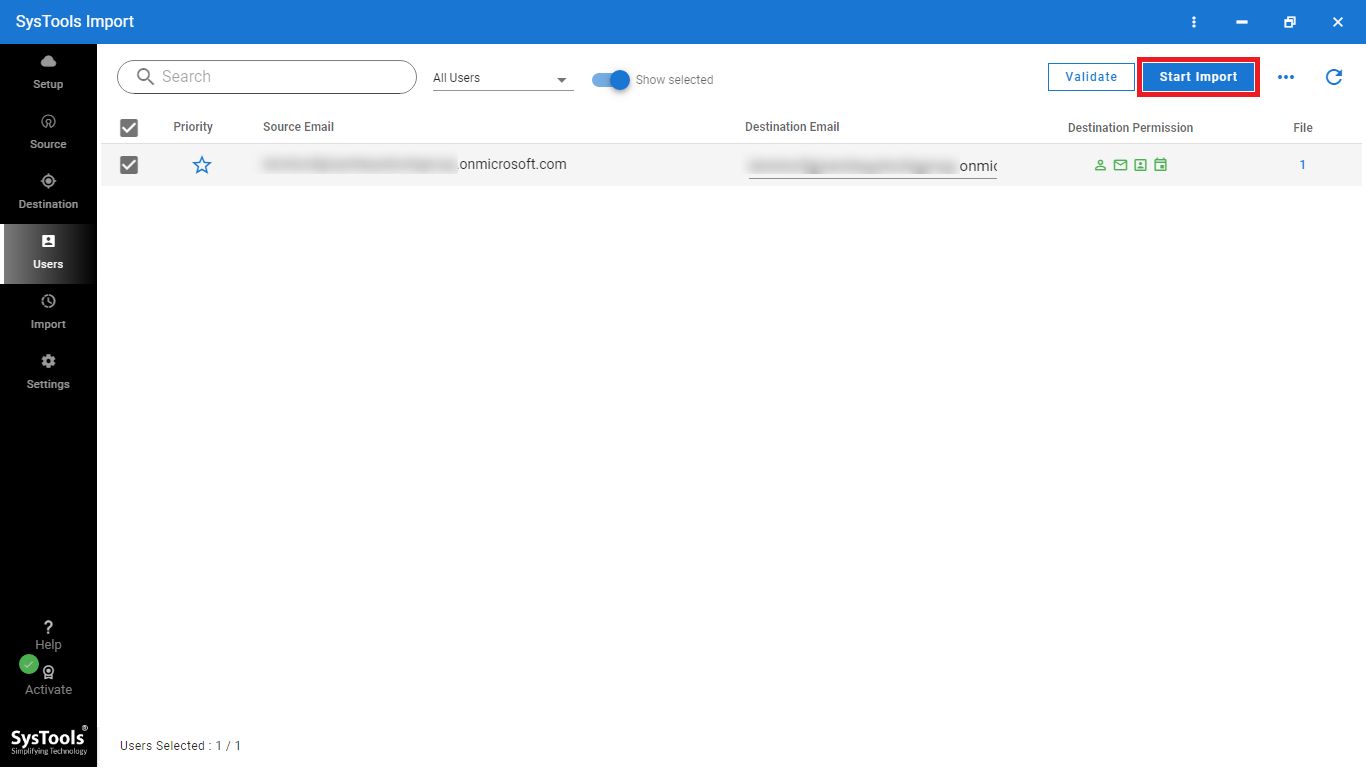
You'll receive a notification that the import process has started. Track the progress in the "In Progress" tab.

In Progress

If some files are pending, check the "Pending" tab. You can also stop the import process by clicking the "Stop Import" button.

check the Pending tab

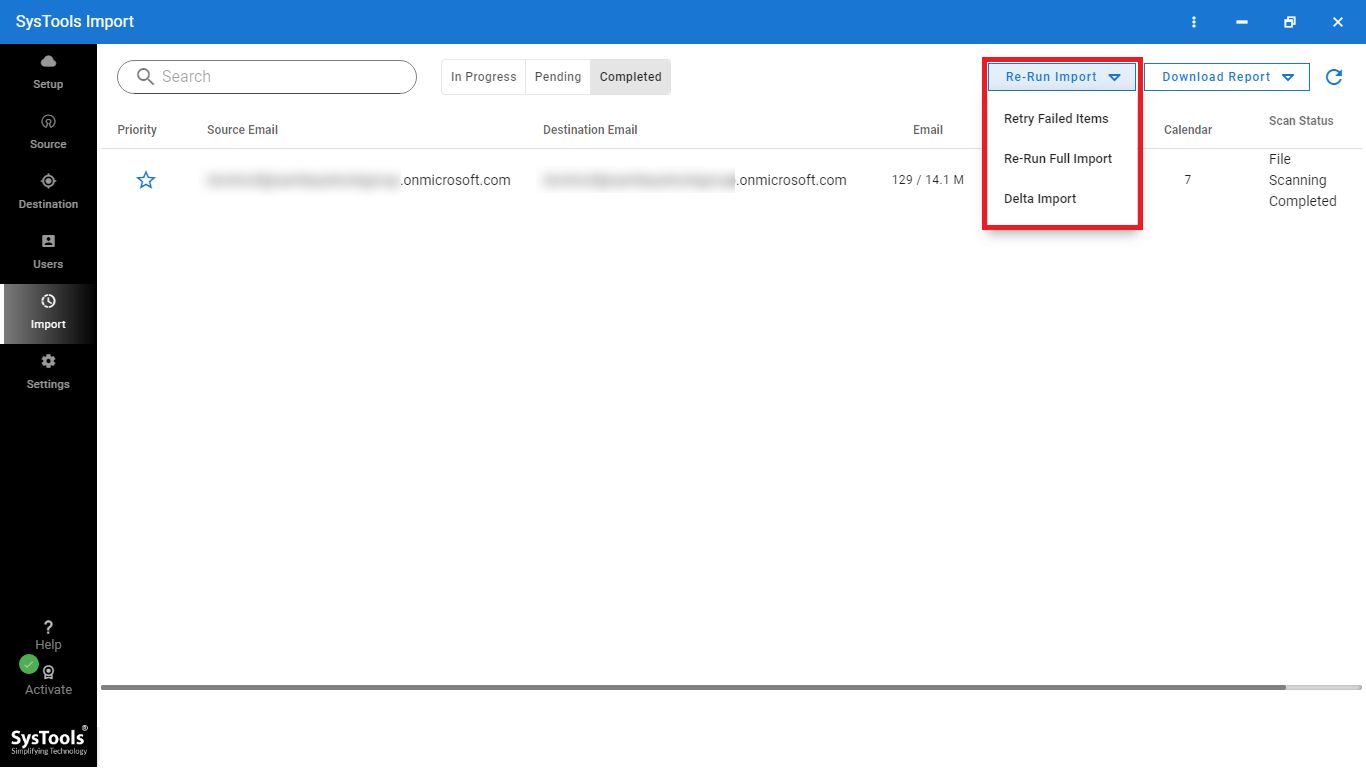
Once the import is completed, you can view the final status under the "Completed" tab.

In Progress
STEP 14

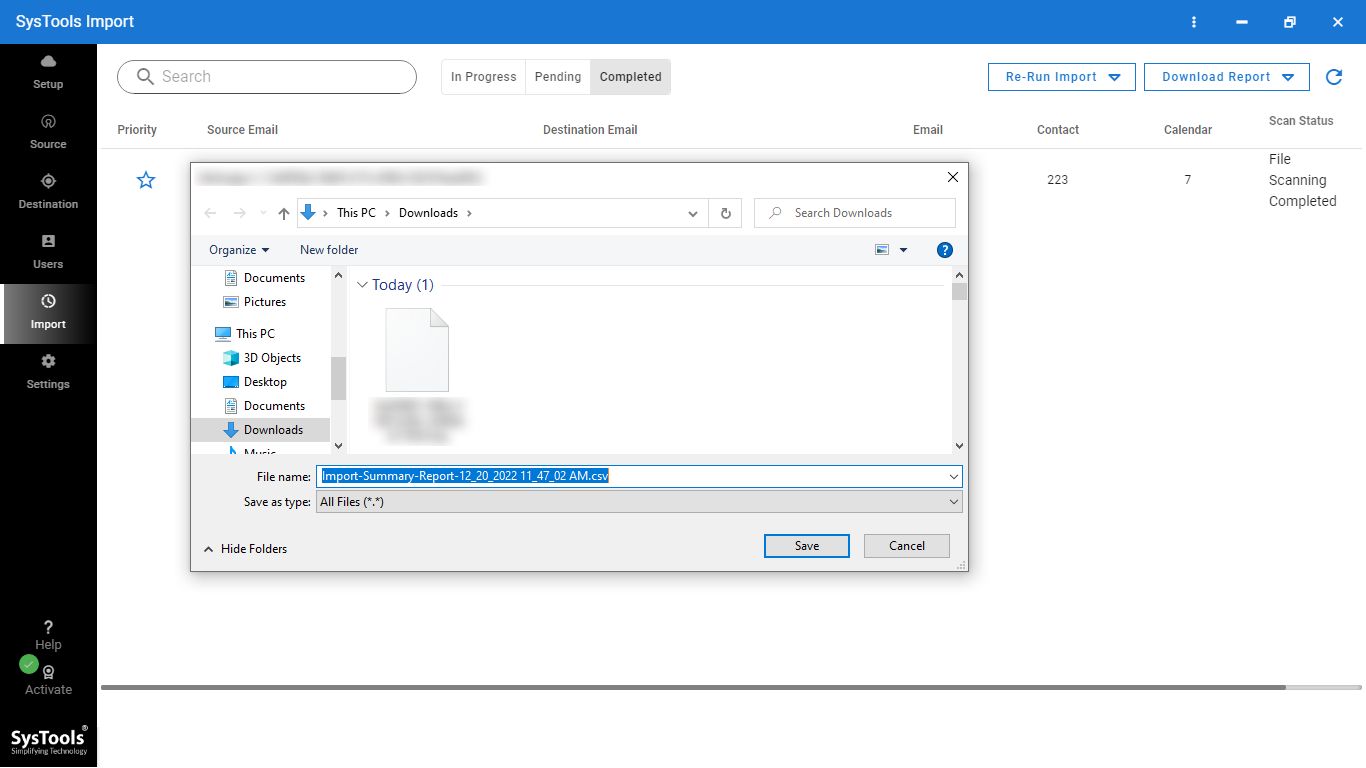
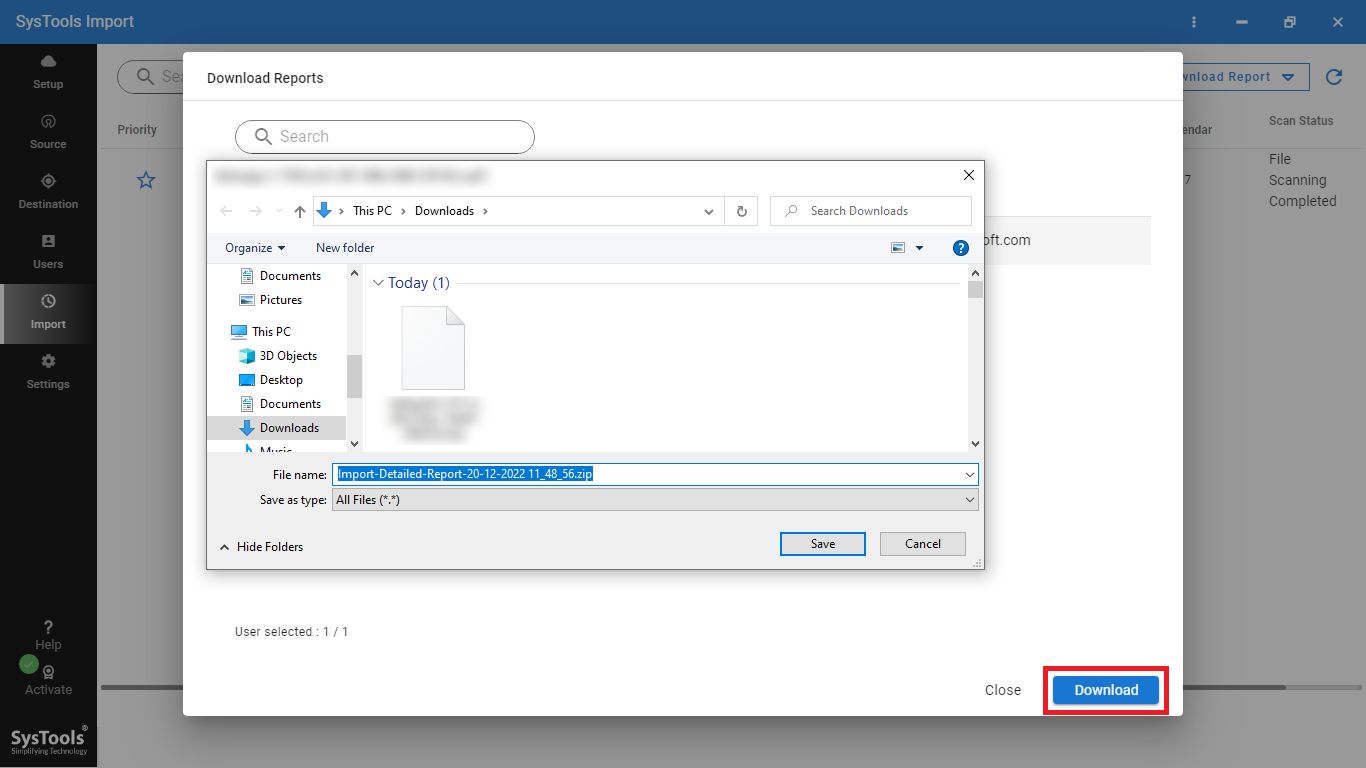
After a successful import, you can download the reports. There are two options:

Summary Report: A single CSV file containing an overview of the entire import process.

Summary Report

Detailed Report: Individual CSV files for each user, detailing their imported data.

Detailed Report

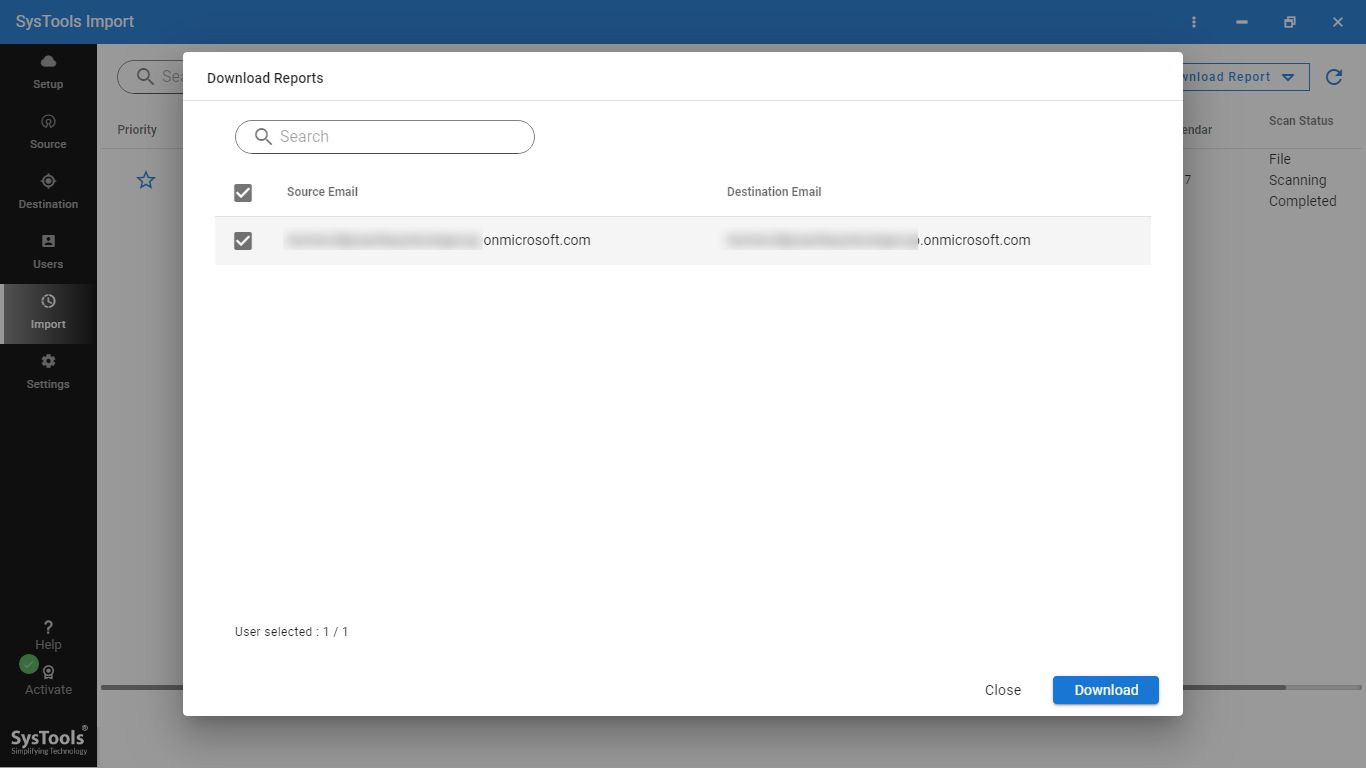
Choose the report format you prefer and save it to your desired location.

Choose the report
STEP 15

If required, you can restart the import with the following options:

  • Retry Failed Items: Reattempt to import any data that failed during the initial process.
  • Re-run Full Import: Start the full import process from scratch.

Delta Import: Import only the newly added data, avoiding duplicates.

restart the import
STEP 16

Log into your Office 365 account and open Outlook to verify the imported data. You'll find the folder structure organized as it was in the source account, confirming that the import was successful.

Before:

before email

After:

after email

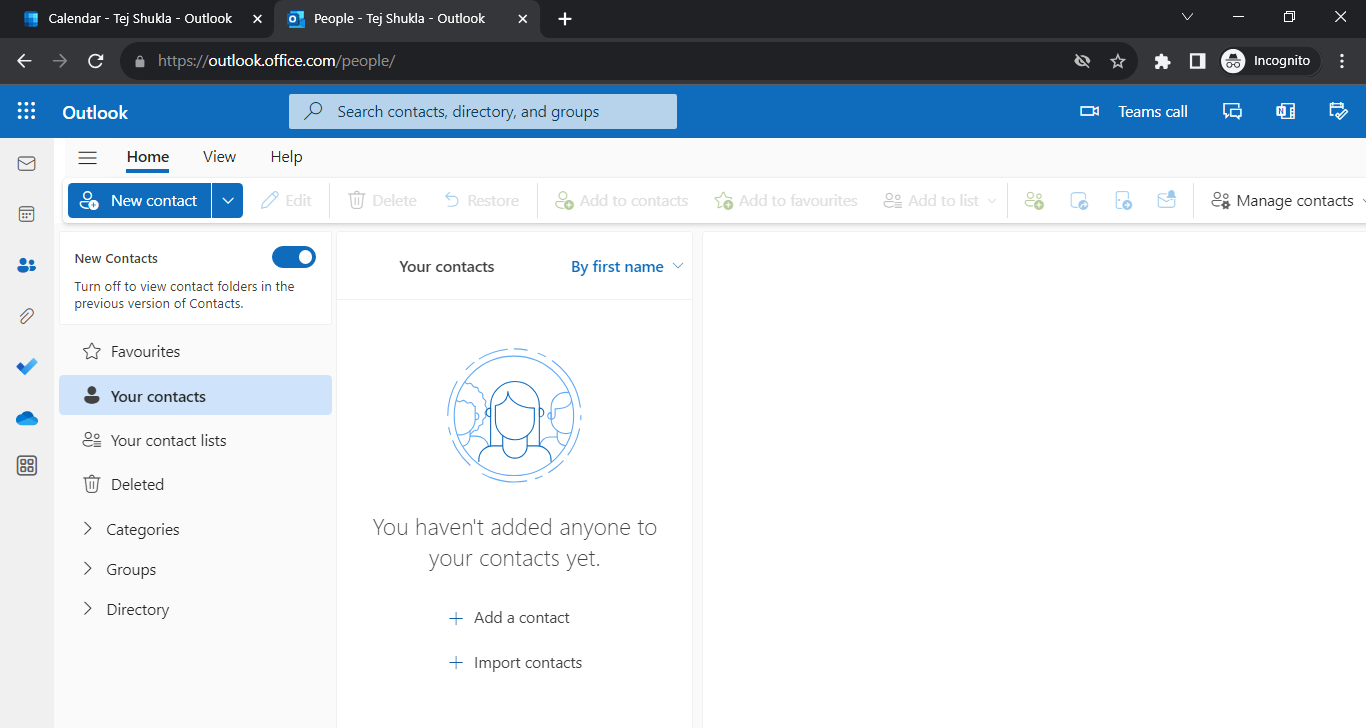
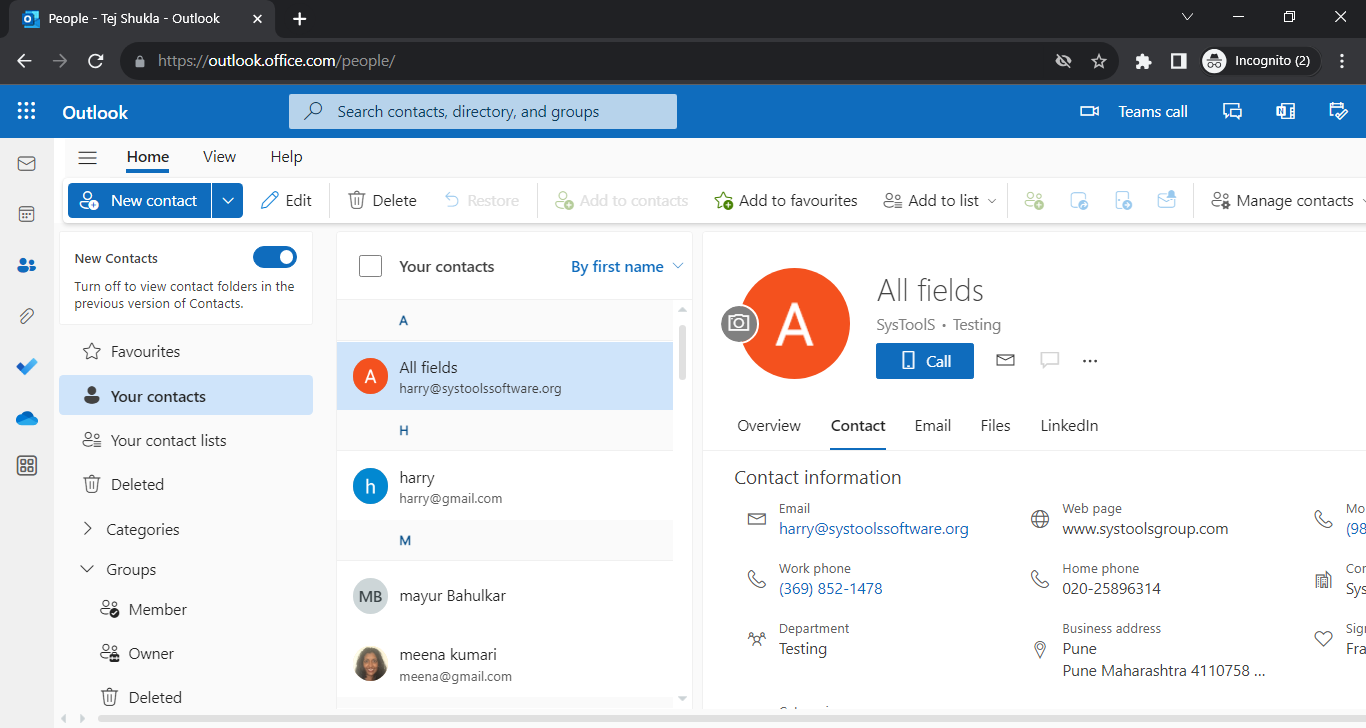
Same is the case for contacts

Before:

before contacts

After:

after contacts

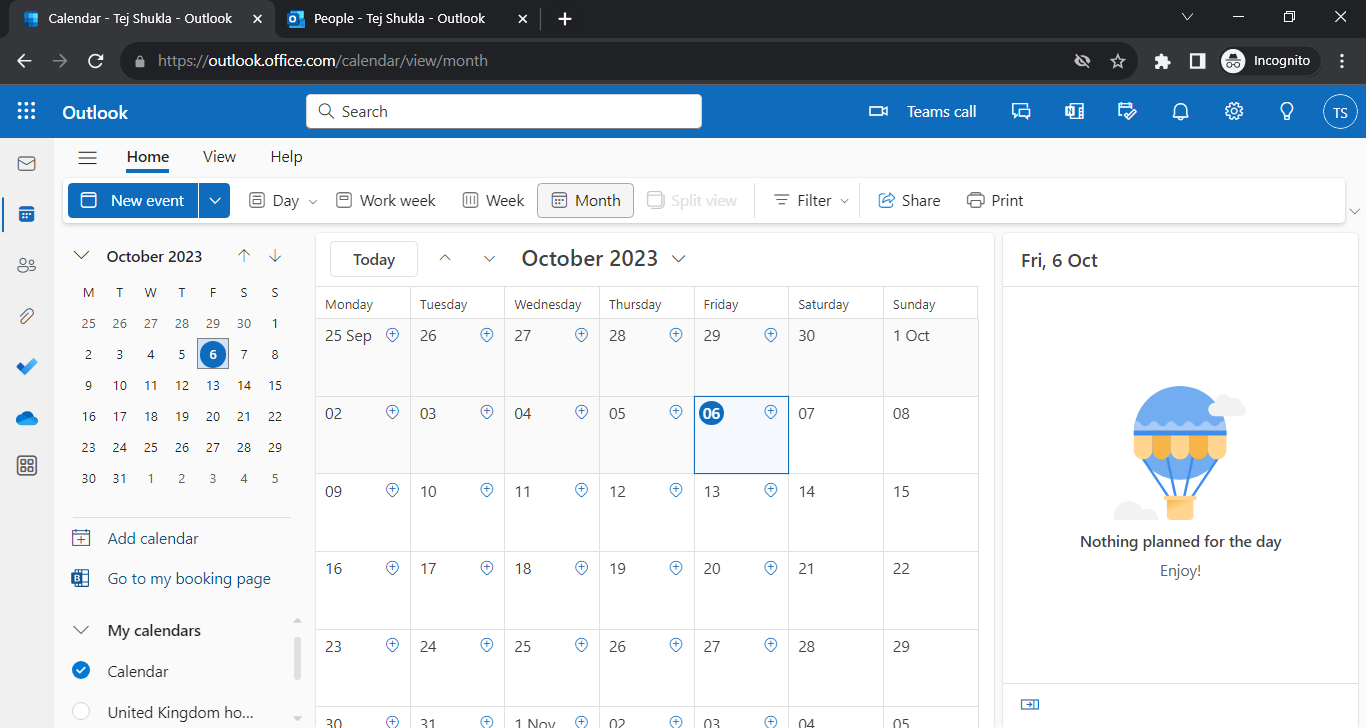
This also applies to calendars

Before:

before calendar

After:

after calendar